
1. Installing SJ Photo Gallery
After you downloaded your Joomla extension, just go to Extensions -> Extension Manager -> select the Upload Package File from the top tabs -> click on the Choose File button and select the SJ Photo Gallery zip file -> click on the Upload & Install blue button.
- Details
- Category: SJ Photo Gallery

These screenshots are from the SJ Social Cloud backend:
- Details
- Category: SJ Social Cloud

1. Installing SJ Social Cloud
After you downloaded your Joomla extension, just go to Extensions -> Extension Manager -> select the Upload Package File from the top tabs -> click on the Choose File button and select the SJ Social Cloud zip file -> click on the Upload & Install blue button.
- Details
- Category: SJ Social Cloud

Welcome to the SJ Sticky Any Module for Joomla ! This guide will walk you through the complete setup process, from installation to configuring your first sticky panels.
Step 1: Installation
First, let's install the module.
- Log in to your Joomla 6 Administrator.
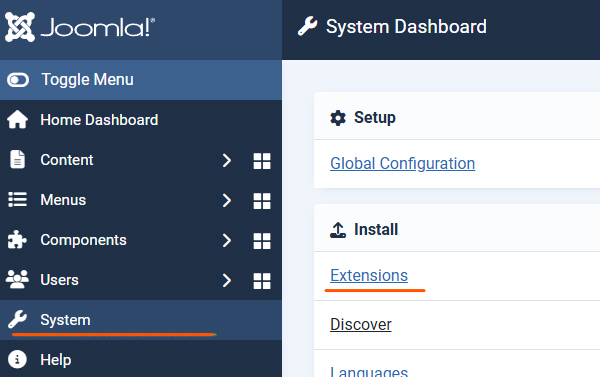
- Navigate to System > Install > Extensions.
- Drag and drop the
mod_sj_sticky_any_module-vjx.v.xx.zipfile you downloaded onto the upload area. - Once you see the "Installation of the module was successful" message, you are ready to start.

Step 2: The Core Concept (A Module Inside a Module)
This is the most important step to understand. The SJ Sticky Any Module is a "wrapper". It functions as a container that "holds" your other modules.
To make it work, you will always need TWO modules:
-
The Content Module: This is your actual content (e.g., a Login Form, a Menu, or Custom HTML). You will not assign this to a normal template position.
-
The Sticky Module (This Extension): This is the container that holds your content module. You will assign this to a real template position (e.g.,
position-7ordebug).
The "magic" that links them is a custom position name you will invent.
Let's build one.
Step 3: Create Your First Module (The "Content")
First, let's create the content you want to make sticky.
-
Navigate to Content > Site Modules.
-
Click New.
-
Select a module type. For this example, let's use Custom HTML.
-
Give it a Title, for example: "My Sticky Content".
-
In the editor, type: "This is my first sticky panel!"
-
This is the key step: In the Position field on the right, do not select from the dropdown. Instead, type in a unique, new position name that you invent. Let's use:
sticky-login -
Set the Status to
Published. -
Click Save & Close.

Step 4: Configure the SJ Sticky Any Module (The "Container")
Now, let's create the sticky container that will "find" and display your content.
-
Navigate to Content > Site Modules again.
-
Click New.
-
Select SJ Sticky Any Module.
-
Give it a Title, for example: "Sticky Container (Login)".
-
On the right, set its Position to a real position in your template (e.g.,
bottom-a,position-7, ordebugif you are just testing.). -
Set the Status to
Published. -
Click the General Setup tab. This is where we will configure the scenarios.
Step 5: Configuration Scenarios & Examples
Here are three common setups to get you started.
Scenario A: The "Smart Handle" Side-Panel
-
Goal: A sleek, icon-only login panel that slides out from the left side of the screen on desktop.
-
Use this for: Login forms, search bars, shopping carts.
-
In your "Sticky Container (Login)" module, go to the General Setup tab.
-
Sticky position name: Enter the name you invented in Step 3:
sticky-login -
Positioning settings:
-
Margin Left:0 -
Margin Top:200
-
The rest of them leave them empty.
-
Starting settings:
-
Panel start (Desktop):Closed
-
- Main Click Element (Desktop):
-
Click element (Desktop):Flip Bar (Handle) - Toggler
-
- Flip Bar (Handle) Settings:
-
Flip bar position:Right (Handle on Right of Panel)(This makes the handle stick out from the panel) -
Toggler Icon: SelectSettings (Cog)from the list. -
Flip bar Text: (Leave this field completely empty)
-
- Panel Settings:
-
Panel Background Color:#fafafa(This is transparent by default)
-
-
Go to the Responsive Settings tab.
-
Mobile Behavior:Disable (Hide Module)(We'll make a separate one for mobile later).
-
-
Click Save.

Result: You will now have a clean, icon-only tab fixed 200px from the top left of your desktop screen. Clicking it will slide out your "This is my first sticky panel!" content (or your login module, if you published that instead).

Scenario B: The "Pop Up"
-
Goal: A one-time announcement bar on the page that users can dismiss for their session.
-
Use this for: Special offers, important announcements.
(Note: You would create a New SJ Sticky Any Module for this. You can have unlimited sticky modules on one page.)
-
General Setup tab:
-
Sticky position name:
sticky-notice -
Positioning settings:
-
Margin Top:300 -
Margin Left:100
-
-
Main Click Element (Desktop):
-
Click element (Desktop):Close Button ('x' icon) - Pop Up
-
-
Close Button ('x') Settings:
-
Desktop 'x' Vertical Position:Top -
Desktop 'x' Horizontal Position:Right -
'x' Button Hide Period:For this Session
-
-
Panel Settings:
-
Panel Background Color:#e3e3e3(Or a color that matches your brand) -
Panel padding:10px
-
-
Responsive Settings tab:
-
Mobile Behavior:Disable (Hide Module)
-
-
Save the module.
-
Now, create a new Custom HTML module, write your notice (e.g., "Welcome! Get 10% off with code STICKY"), and publish it to the
sticky-noticeposition.
Result: A pop-up will appear on the screen of your site. When you click the 'x' icon, it will disappear and not return when you refresh the page.

Scenario C: The "Desktop-to-Mobile" Transforming Menu (Advanced)
-
Goal: A slide-out menu on the right side of the desktop, which transforms into a sticky bottom bar on mobile.
-
Use this for: Your main site navigation.
-
General Setup tab:
-
Sticky position name:
sticky-menu -
Positioning settings:
-
Margin Right:0 -
Margin Top:200px
-
-
Main Click Element (Desktop):
-
Click element (Desktop):Flip Bar (Handle) - Toggler
-
-
Flip Bar (Handle) Settings:
-
Flip bar position:Left (Handle on Left of Panel) -
Toggler Icon:Menu (Hamburger) -
Flip bar Text: (Leave empty)
-
-
Go to the Responsive Settings tab:
-
Mobile Breakpoint Width (px):768 -
Mobile Behavior:Override Position (Mobile Sticky) -
Mobile Sticky Position:Sticky Bottom Bar (100% width) -
Mobile: Panel Start:Closed -
Mobile: Click Element:Flip Bar (Handle) - Toggler
-
-
Save the module.
-
Finally, go to your Main Menu module (
mod_menu) and publish it to thesticky-menuposition.
Result: On desktop, you'll have a clean icon tab on the right. When you resize your browser to be smaller than 768px, the menu will appear at the bottom of the screen. Clicking this new mobile handle will slide the menu up.


Troubleshooting & Quick Tips
-
"My sticky module is empty!"
-
This is the most common issue. Remember, you need two modules. Make sure the "Sticky position name" in the SJ Sticky Module exactly matches the "Position" you set for your content module (e.g.,
mod_login).
-
-
"My content module appears in two places!"
-
You have assigned your content module (e.g.,
mod_login) to a real template position. You must unpublish it from that real position and only have it published to your custom-named position (e.g.,sticky-login).
-
-
"My icon is not showing."
-
The module uses Joomla's built-in vector icon fonts. Ensure your template is loading either IcoMoon or Font Awesome (all standard Joomla 6 templates do).
-
Need a hand setting things up? If something isn’t explained here, send me a message — I’ll be glad to guide you through the process.
- Details
- Category: SJ Sticky any Module

Audience: Joomla administrators and site editors who have never used this module before. This guide covers installation, configuration, content sources (folder/manual), layout choices, styling, multi-instance usage, embedding, troubleshooting and recommended screenshots.
- Details
- Category: SJ Ultimate Gallery

1. Installing the Ultimate Gallery module
Below are the steps for installing and setting up Ultimate Gallery Grid layout:
- Details
- Category: SJ Ultimate Gallery

1. Installing the Ultimate Gallery module
Below are the steps for installing and configuring Ultimate Gallery Joomla module:
- Details
- Category: SJ Ultimate Gallery
Read more: SJ Ultimate Gallery - how to set up Thumbs layout

This guide will take you through the entire process of setting up the SJ Video Player, from installation to advanced customization. Follow these steps to create a professional video playlist for your audience.
Table of Contents
- 1. Requirements & Compatibility
- 2. Installation & Updates
- 3. Initial Setup & Global Settings
- 4. Adding Content: Manual vs. Folder Mode
- 5. Organizing Your Playlist
- 6. Customizing the Design
- 7. Troubleshooting & FAQ
- 8. Support & Feedback
1. Requirements & Compatibility
Before installing, ensure your environment meets the following criteria to guarantee a smooth performance:
- Joomla Version: Compatible with Joomla 4.x, Joomla 5.x., Joomla 6.x.
- PHP Version: PHP 7.4 or higher (PHP 8.x recommended).
- Browser Support: Modern browsers (Chrome, Firefox, Safari, Edge).
- Video Formats: Local files must be in
.mp4(H.264) for maximum compatibility.
2. Installation & Updates
2.1. Installation
Log in to your Joomla Administrator area. Navigate to System → Install → Extensions. Upload the mod_sj_video_player.zip file. Once finished, go to Content → Site Modules to open the module and begin configuration.
2.2. Performing Updates
To update the module, simply install the newest version over the existing one. Your settings and playlists are stored in the database and will not be lost during this process.
Using the Joomla update system:
- Navigate to: System > Manage > Extensions
- Click on the Check for Updates button
- Select the module from the list and press Update button
2.3. License Key
- Navigate to: System > Update Sites
- Find the extension
- Click on the name of the extension
- In the field Download Key insert your Key
- The Key is the order reference.
3. Initial Setup & Global Settings
Before adding videos, define how the player sits on your page. These settings ensure the player matches your site's layout.
- Module Position: Assign the module to a template position (e.g., "Main Content" or "Sidebar").
- Menu Assignment: Choose which pages should display the player.
- Player Dimensions: Set the Max Width (e.g., 100% for full width or 800px ) and Alignment.
4. Adding Content: Manual vs. Folder Mode
The module offers two ways to populate your playlist. You can choose your mode in the Content Mode dropdown.
4.1. Manual Mode (The "Hand-Picked" Approach)
Use this mode if you want to mix sources like YouTube, Vimeo, and specific local files. You add each video row manually.
- Adding Rows: Click "Add New" to create a row.
- Sources: Paste a direct link or select a file from the Media Manager.
- Poster: Select a custom image. You can store this on your server or you can place a link to another location. (eg:
https://i.ytimg.com/vi/t6a37J87bew/mqdefault.jpg) - Video Title: Add a title for the video
- Description: Add a description for the video. This field supports html markup.
4.2. Folder Mode (The "Automation" Approach)
This is the fastest method for local MP4 files. The module "reads" your folder and builds the playlist for you.
- The Folder: Select a folder from your
/imagesdirectory. - Scan & Sync: Click the "Scan & Sync Folder" button. The module identifies every
.mp4file in that folder. - Automatic Titles: The module automatically cleans the file names (e.g.,
01_intro_video.mp4becomesIntro Video). - Automatic Posters: If an image in that folder has the same name as the video, it is automatically assigned as the cover.
- Description: Add a description for the video. This field supports html markup.
5. Organizing Your Playlist
Control the flow of your content to improve user experience.
- Ordering Options: Select between Alphabetical, By Date (Newest first), or Manual order.
- Playlist Height: If you have many videos, set a Max Height (e.g., 600px). This keeps the player compact and adds a professional scrollbar to the list.
6. Customizing the Design
This is where you make the module yours. No coding is required; just use the intuitive interface.
6.1. Colors & Branding
Match your brand using the color pickers for the Accent Color (buttons/progress), Playlist Background, and Text Color.
6.2. Visual Effects
Enable Box Shadows to make the player "pop" off the page. Adjust Hover Styles to change the color of a playlist item when a user moves their mouse over it.
6.3. Descriptions
Choose the font size and the height for the video description area. Clear descriptions help users understand what they are about to watch.
7. Troubleshooting & FAQ
If you encounter issues, check these common solutions:
- Video doesn't play: Ensure the file is an
.mp4and the filename has no spaces or special characters. - YouTube error: Verify that "Embedding" is allowed in the video settings on YouTube.
- Module is missing: Confirm the module is Published and assigned to the correct Menu Item.
- Update fails with the mesage:
Failed to download package. Download it and install manually from https://extensionspot.com/extensions_update/php/sj_video_player_update.php?jver=J6&ext=EX022&es_key=123&msg=Enter_key_or_update_subscription.- Check if the update key is correct or the support period has ended
8. Support & Feedback
We provide full support for our users. If you have questions that aren't answered here:
- Official Tickets: Open a support ticket on our website.
- Bug Reports: We appreciate technical feedback to help us improve the module for everyone.
Thank you for choosing SJ Video Player!
- Details
- Category: SJ Video Player

These are all the backend options for this module:
- Details
- Category: Spot Featured Articles

1. Installing Spot Featured Articles
After you downloaded your Joomla extension, just go to Extensions -> Extension Manager -> select the Upload Package File from the top tabs -> click on the Choose File button and select the Spot Featured Articles zip file -> click on the Upload & Install blue button.
- Details
- Category: Spot Featured Articles
