
Thank you for choosing ES Audio Player!
This is not just a simple MP3 player. ES Audio Player is a smart playlist builder. Its most powerful feature is its ability to scan your server folders, read your MP3s' ID3 tags (like Title, Artist, and Album), and automatically build a rich playlist for you, saving you hours of manual data entry.
This guide will walk you through the complete setup process, from installation to configuring your first playlist.
1: Installation
First, let's install the module.
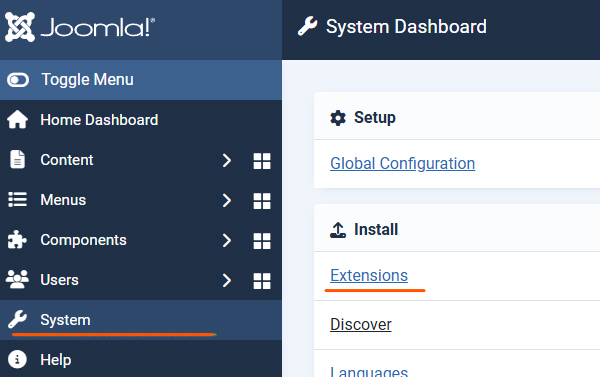
- Log in to your Joomla 6 Administrator.
- Navigate to System > Install > Extensions.
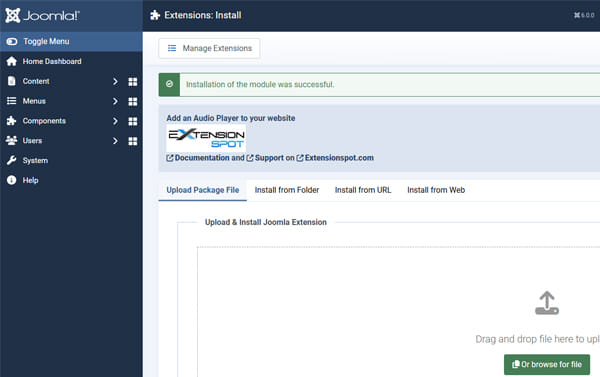
- Drag and drop the
mod_es_audio_player-vjx.v.xx.zipfile you downloaded onto the upload area. - Once you see the "Installation of the module was successful" message, you are ready to start.
2. Before You Begin: Prepare Your Files
The module works by scanning folders on your server. Therefore, you must upload your music and images first.
-
Using your FTP client or the Joomla Media Manager (
Content>Media), create a folder for your music.-
Example:
images/audio
-
-
(Optional) Create a second folder for your poster/album images.
-
Example:
images/audio
-
-
Upload all your
.mp3files into your music folder and your images into the images folder.

3. Create & Assign Your Module
Next, we need to create an instance of the module and tell Joomla where to display it.
-
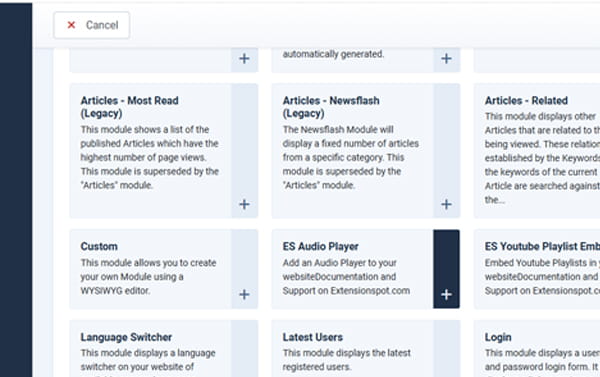
Navigate to Content > Site Modules.
-
Click the New button in the toolbar.
-
Select ES Audio Player from the list.
-
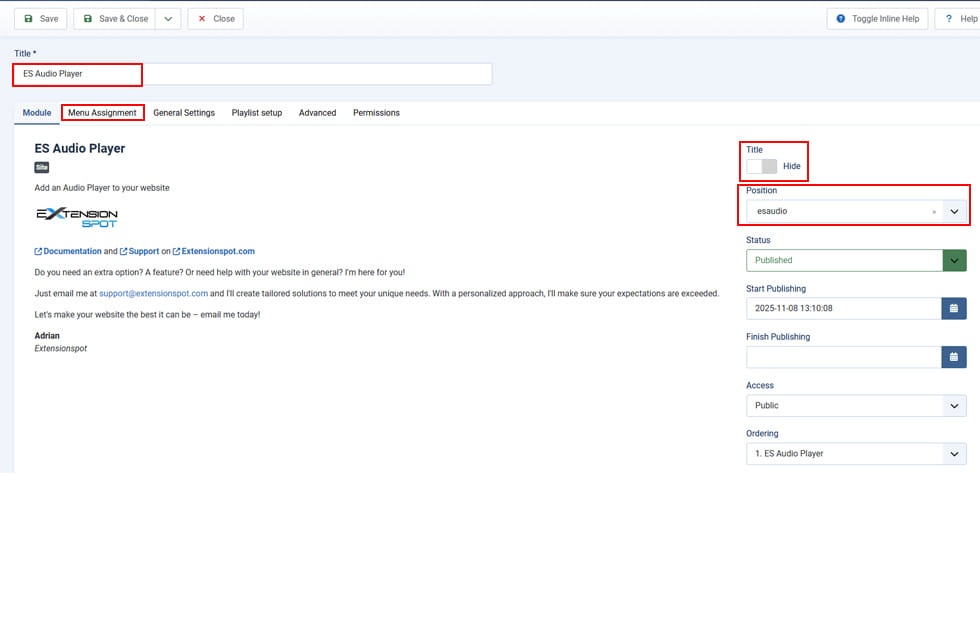
Give your module a Title (e.g., "My Weekly Podcast"). We recommend setting Show Title to Hide.
-
On the right-hand side, select a Position from your template where you want the player to appear (e.g.,
main-bottom,sidebar-right, or a dedicated position). -
Go to the Menu Assignment tab and choose which pages the module should appear on (e.g., "On all pages" or just your "Blog" page).
4. Configuring Your Playlist (The Smart Way)
This is the most important part. We will now tell the module where to find your music.
-
Click on the "Playlist setup" tab.
-
You will see two fields at the top: "Music folder" and "Images folder".
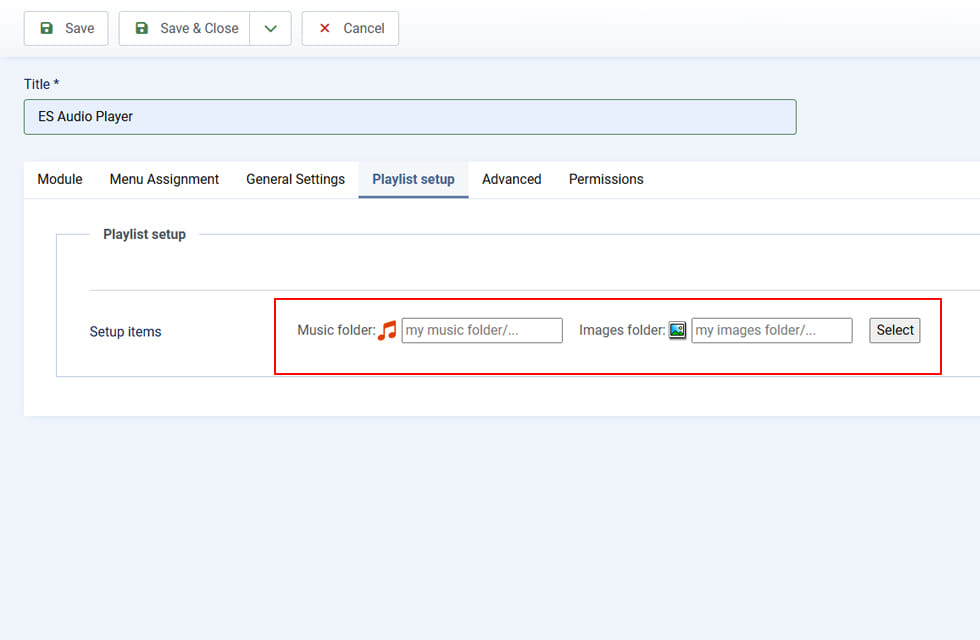
Step 4.1: Set Your Folders
You must tell the module the relative path from your website's root directory to the folders you created in Step 2.
-
Music folder: Type in the path to your music.
-
Example:
images/audio
-
-
Images folder: Type in the path to your images.
-
Example:
images/audio
-
-
CRITICAL STEP: After entering the paths, click the "Select" button located to the right of these fields.
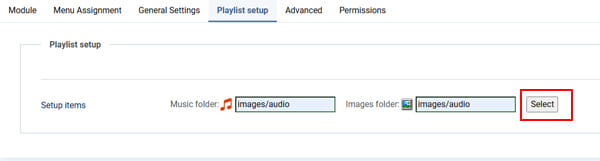
This will save your settings and refresh the page. The module has now scanned your folders.
Step 4.2: Manage Your Playlist
-
Go back into the "Playlist setup" tab.
-
If your paths were correct, you will now see a full list of every MP3 file the module found, along with all the ID3 tag data it successfully read (Title, Artist, Duration, etc.).
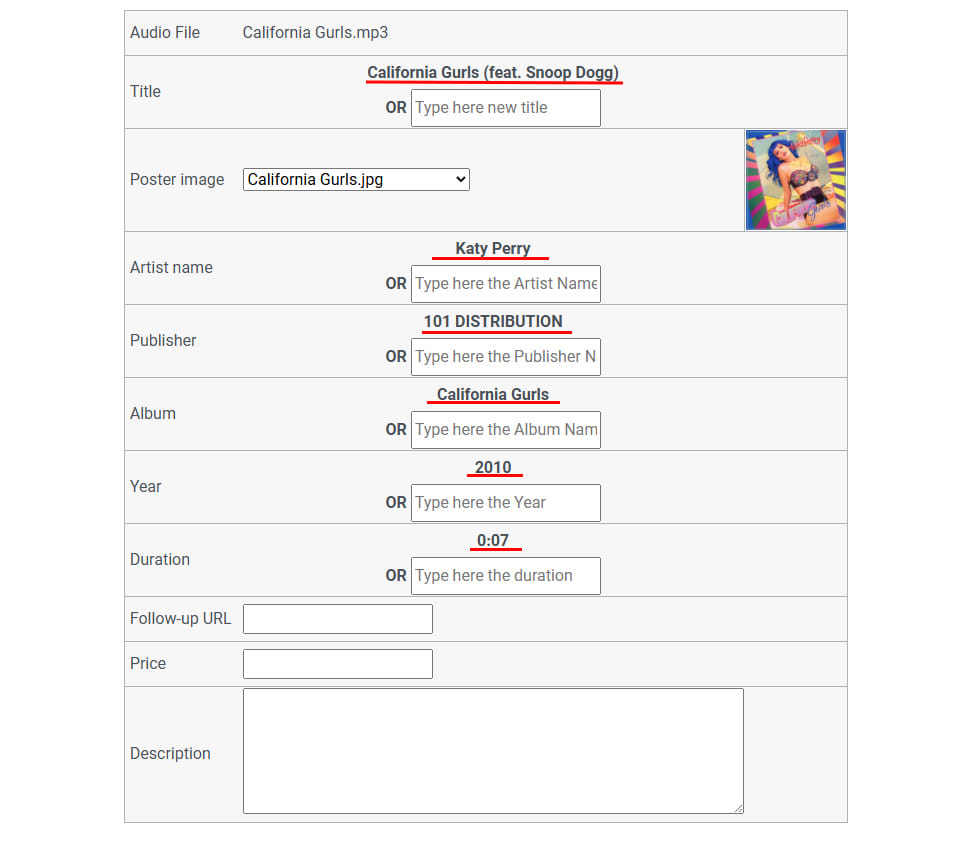
-
For each song, you can now fine-tune the playlist:
-
Override Tags: The module shows the read-only ID3 tag (e.g.,
Title: My Song from ID3). If this tag is wrong or you want to change it, simply type your new value in the text box below it (e.g.,OR Type here new title). -
Set Poster image: Use the dropdown menu to select a poster image from the Images folder you specified.
-
Follow-up URL / Price: If you want to sell your music, you can enter a "Buy Now" URL in the 'Follow-up URL' field and a 'Price'. These will display if enabled in the module's main options.
-
-
When you are finished customizing your playlist, click Save & Close.
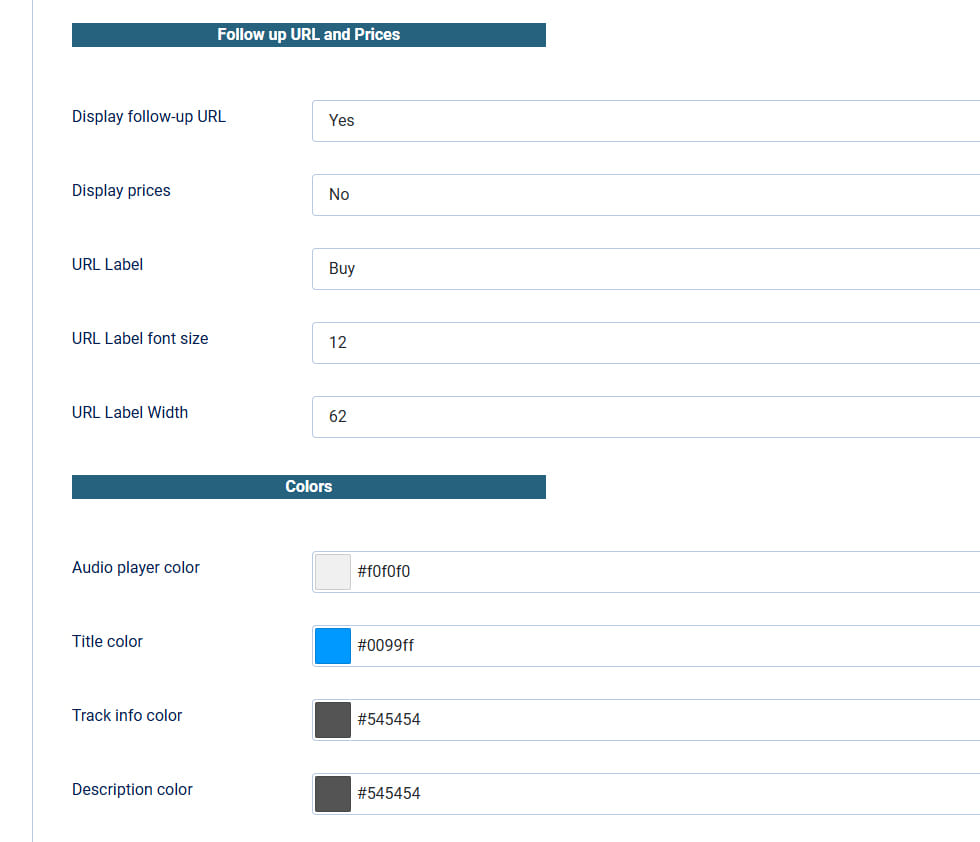
5. Other Settings & Styling
The "Module" tab contains all the settings for customizing the player's appearance and behavior.
-
Autoplay: Set to 'Yes' to make the player start automatically. (Note: Many modern browsers block autoplay with sound).
-
Player & Style Options: Here you can set the Audio player width and customize all the Colors (Title color, Artist color, Background color) to perfectly match your website's template.
-
Display Options: Choose which elements to show or hide, such as
displaypicture,display_artist,display_album,display_year, etc. -
Buy/Price Options: Configure if and how the 'Buy' button and 'Price' are displayed.
6. Troubleshooting
Q: The player is not on my site!
-
A: Check two things:
-
Did you set a Position in Step 3?
-
Did you assign the module to the correct Menu Item in Step 3?
-
Q: My playlist is empty in the backend (Step 4.2)!
-
A: This is almost always a folder path issue.
-
Go back to Step 4.1. Ensure your paths are relative from the Joomla root.
-
Correct:
images/audio -
Incorrect:
/images/audio/(leading slash) -
Incorrect:
http://mysite.com/images/audio(full URL)
-
-
Did you click the "Select" button (or
Save) after entering the paths? The module must save and reload to be able to scan the new location. -
Check that your folders and files have standard web permissions (e.g., 755 for folders, 644 for files).
-
