
Welcome to the SJ Sticky Any Module for Joomla ! This guide will walk you through the complete setup process, from installation to configuring your first sticky panels.
Step 1: Installation
First, let's install the module.
- Log in to your Joomla 6 Administrator.
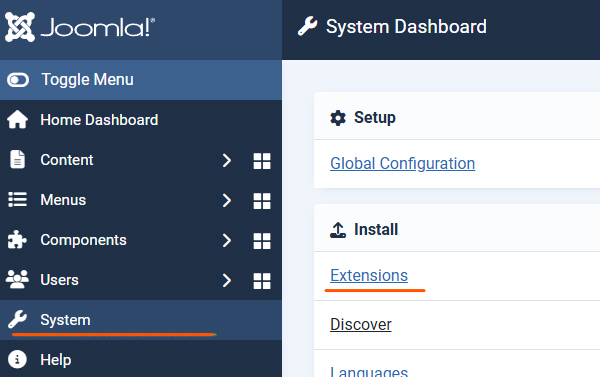
- Navigate to System > Install > Extensions.
- Drag and drop the
mod_sj_sticky_any_module-vjx.v.xx.zipfile you downloaded onto the upload area. - Once you see the "Installation of the module was successful" message, you are ready to start.

Step 2: The Core Concept (A Module Inside a Module)
This is the most important step to understand. The SJ Sticky Any Module is a "wrapper". It functions as a container that "holds" your other modules.
To make it work, you will always need TWO modules:
-
The Content Module: This is your actual content (e.g., a Login Form, a Menu, or Custom HTML). You will not assign this to a normal template position.
-
The Sticky Module (This Extension): This is the container that holds your content module. You will assign this to a real template position (e.g.,
position-7ordebug).
The "magic" that links them is a custom position name you will invent.
Let's build one.
Step 3: Create Your First Module (The "Content")
First, let's create the content you want to make sticky.
-
Navigate to Content > Site Modules.
-
Click New.
-
Select a module type. For this example, let's use Custom HTML.
-
Give it a Title, for example: "My Sticky Content".
-
In the editor, type: "This is my first sticky panel!"
-
This is the key step: In the Position field on the right, do not select from the dropdown. Instead, type in a unique, new position name that you invent. Let's use:
sticky-login -
Set the Status to
Published. -
Click Save & Close.

Step 4: Configure the SJ Sticky Any Module (The "Container")
Now, let's create the sticky container that will "find" and display your content.
-
Navigate to Content > Site Modules again.
-
Click New.
-
Select SJ Sticky Any Module.
-
Give it a Title, for example: "Sticky Container (Login)".
-
On the right, set its Position to a real position in your template (e.g.,
bottom-a,position-7, ordebugif you are just testing.). -
Set the Status to
Published. -
Click the General Setup tab. This is where we will configure the scenarios.
Step 5: Configuration Scenarios & Examples
Here are three common setups to get you started.
Scenario A: The "Smart Handle" Side-Panel
-
Goal: A sleek, icon-only login panel that slides out from the left side of the screen on desktop.
-
Use this for: Login forms, search bars, shopping carts.
-
In your "Sticky Container (Login)" module, go to the General Setup tab.
-
Sticky position name: Enter the name you invented in Step 3:
sticky-login -
Positioning settings:
-
Margin Left:0 -
Margin Top:200
-
The rest of them leave them empty.
-
Starting settings:
-
Panel start (Desktop):Closed
-
- Main Click Element (Desktop):
-
Click element (Desktop):Flip Bar (Handle) - Toggler
-
- Flip Bar (Handle) Settings:
-
Flip bar position:Right (Handle on Right of Panel)(This makes the handle stick out from the panel) -
Toggler Icon: SelectSettings (Cog)from the list. -
Flip bar Text: (Leave this field completely empty)
-
- Panel Settings:
-
Panel Background Color:#fafafa(This is transparent by default)
-
-
Go to the Responsive Settings tab.
-
Mobile Behavior:Disable (Hide Module)(We'll make a separate one for mobile later).
-
-
Click Save.

Result: You will now have a clean, icon-only tab fixed 200px from the top left of your desktop screen. Clicking it will slide out your "This is my first sticky panel!" content (or your login module, if you published that instead).

Scenario B: The "Pop Up"
-
Goal: A one-time announcement bar on the page that users can dismiss for their session.
-
Use this for: Special offers, important announcements.
(Note: You would create a New SJ Sticky Any Module for this. You can have unlimited sticky modules on one page.)
-
General Setup tab:
-
Sticky position name:
sticky-notice -
Positioning settings:
-
Margin Top:300 -
Margin Left:100
-
-
Main Click Element (Desktop):
-
Click element (Desktop):Close Button ('x' icon) - Pop Up
-
-
Close Button ('x') Settings:
-
Desktop 'x' Vertical Position:Top -
Desktop 'x' Horizontal Position:Right -
'x' Button Hide Period:For this Session
-
-
Panel Settings:
-
Panel Background Color:#e3e3e3(Or a color that matches your brand) -
Panel padding:10px
-
-
Responsive Settings tab:
-
Mobile Behavior:Disable (Hide Module)
-
-
Save the module.
-
Now, create a new Custom HTML module, write your notice (e.g., "Welcome! Get 10% off with code STICKY"), and publish it to the
sticky-noticeposition.
Result: A pop-up will appear on the screen of your site. When you click the 'x' icon, it will disappear and not return when you refresh the page.

Scenario C: The "Desktop-to-Mobile" Transforming Menu (Advanced)
-
Goal: A slide-out menu on the right side of the desktop, which transforms into a sticky bottom bar on mobile.
-
Use this for: Your main site navigation.
-
General Setup tab:
-
Sticky position name:
sticky-menu -
Positioning settings:
-
Margin Right:0 -
Margin Top:200px
-
-
Main Click Element (Desktop):
-
Click element (Desktop):Flip Bar (Handle) - Toggler
-
-
Flip Bar (Handle) Settings:
-
Flip bar position:Left (Handle on Left of Panel) -
Toggler Icon:Menu (Hamburger) -
Flip bar Text: (Leave empty)
-
-
Go to the Responsive Settings tab:
-
Mobile Breakpoint Width (px):768 -
Mobile Behavior:Override Position (Mobile Sticky) -
Mobile Sticky Position:Sticky Bottom Bar (100% width) -
Mobile: Panel Start:Closed -
Mobile: Click Element:Flip Bar (Handle) - Toggler
-
-
Save the module.
-
Finally, go to your Main Menu module (
mod_menu) and publish it to thesticky-menuposition.
Result: On desktop, you'll have a clean icon tab on the right. When you resize your browser to be smaller than 768px, the menu will appear at the bottom of the screen. Clicking this new mobile handle will slide the menu up.


Troubleshooting & Quick Tips
-
"My sticky module is empty!"
-
This is the most common issue. Remember, you need two modules. Make sure the "Sticky position name" in the SJ Sticky Module exactly matches the "Position" you set for your content module (e.g.,
mod_login).
-
-
"My content module appears in two places!"
-
You have assigned your content module (e.g.,
mod_login) to a real template position. You must unpublish it from that real position and only have it published to your custom-named position (e.g.,sticky-login).
-
-
"My icon is not showing."
-
The module uses Joomla's built-in vector icon fonts. Ensure your template is loading either IcoMoon or Font Awesome (all standard Joomla 6 templates do).
-
Need a hand setting things up? If something isn’t explained here, send me a message — I’ll be glad to guide you through the process.
