
1. Installing Spot Featured Articles
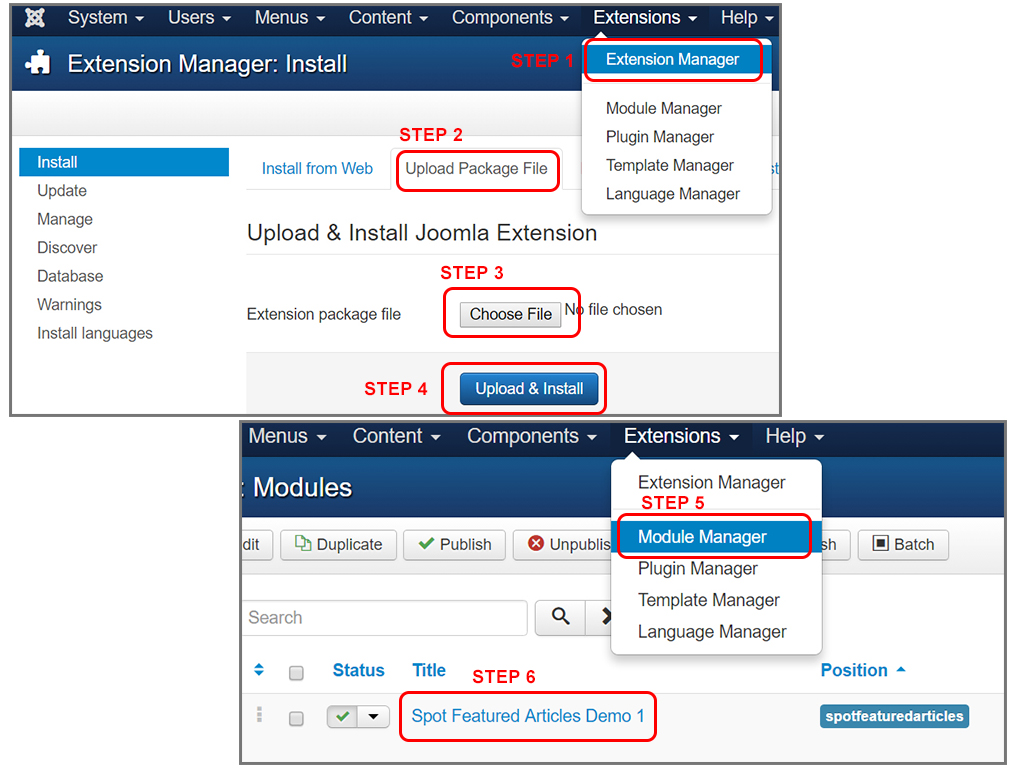
After you downloaded your Joomla extension, just go to Extensions -> Extension Manager -> select the Upload Package File from the top tabs -> click on the Choose File button and select the Spot Featured Articles zip file -> click on the Upload & Install blue button.
Your module will now appear in the Module Manager section.
2. Basic settings for your extension
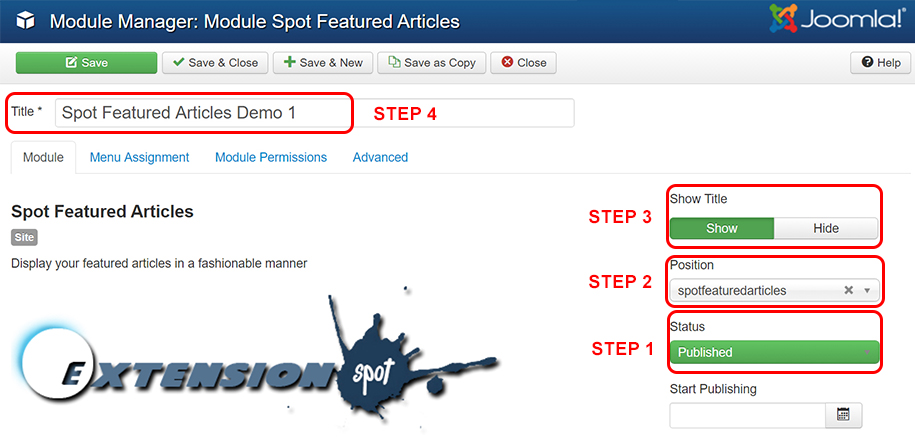
In the Extensions -> Module Manager section, find your Spot Featured Article module and click on it to acess the module's setup section.
You can find all the module's options right in the first window that opens.
First, from the right side of the page change the Status of the module into Published, put it into the desired Position and, if you want your module to be displayed with a title, select from the right Show at the Show Title section. Last, give your module the title that you want it to be displayed with.
Also, don't forget to set the display for your module on the pages you want it to be shown: Module Assignment section.

3. Preliminary settings of the module
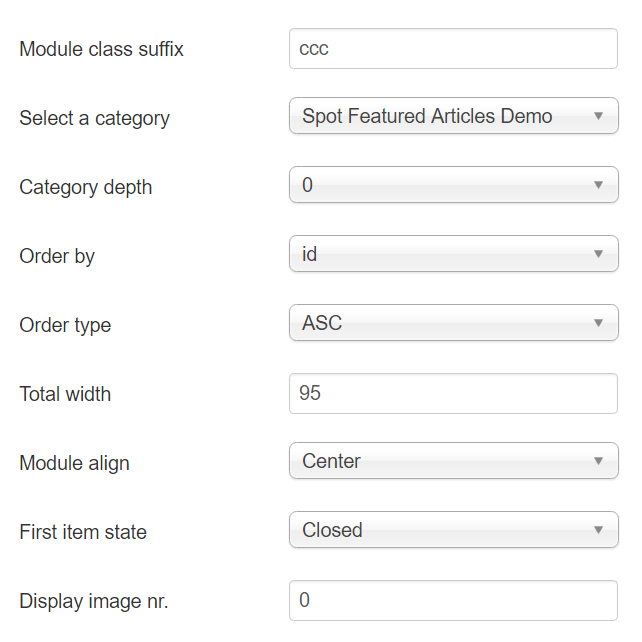
First, you shoul give your module a Module class suffix.
Select then the Category that you would like the articles to be displayed from, and the depth, if you have sub-categories and want to use them.
You can select the order for the articles to be displayed:
- Order by: id, title, created, modified
- Order type: ASC (ascendent), DESC (descendent)
Give your module a Width in percentage and the allignment (Module align: left, right, center).
You can chose the First item state to be opened or closed, this meaning that, on your website, when the page loads, the module will display the first article opened or closed.
Also, you can chose what image to be displayed as the intro image, if you have multiple images in the article to chose from. (Display image nr.)
4. Item settings
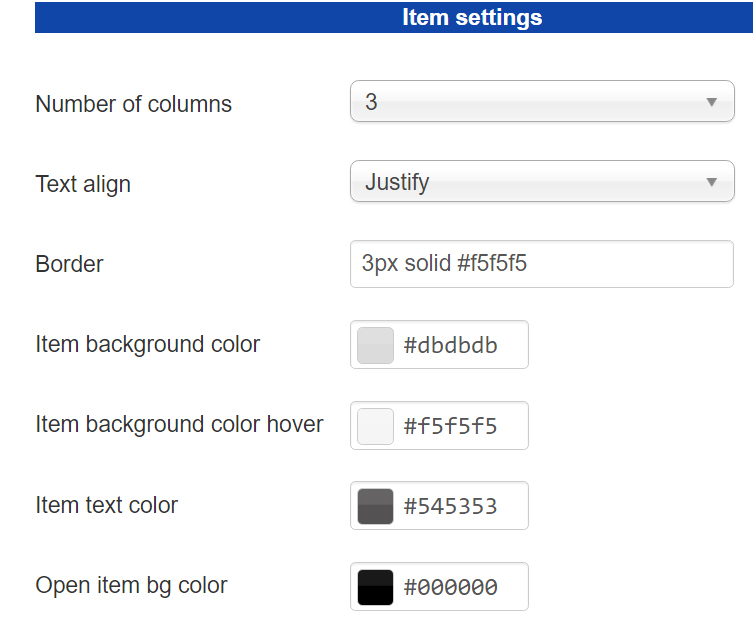
In this section, you will set up the following options for the module:
- Number of columns: you can chose how many columns the module will display in the frontend - 1, 2, 3 or 4 columns.
- Text align: the text displayed inside the article can be alligned Left. Right or Justify
- Border: you can choose whether the article should or shouldn't have border. If you want the article to have border, the command will look like this: 3px solid #f5f5f5 (the no. at the start of the sentence represents how thick you want the line to be, increase the border by increasing the no.; the second word from the sentence represents the style for the line, this can be solid, dotted, dashed, double, ...; the last part of the sentence represents the color.)
- Item background color: choose what color should the article have
- Item background color hover: choose what color should the background of the article have when mouse over
- Item text color: this option allows you to select what color should have the text of the article
- Open item bg color: choose what color should have the opened article's background
5. Title settings
In this section, you will find the options for the article's title as following:
- Title background color: you can add a background for the title of the article
- Title color: you can choose the color for the article's title
- Title align: select the alignment for the title - Left, Right or Center
Also, this section has a Custom CSS where you can add aditional options.

